Connecting to the remote HPC system Torch
Questions:
- How do I open a terminal?
- How do I connect to a remote computer?
Objectives:
- Connect to a remote HPC system.
To access the Torch HPC cluster, you must be connected to the NYU network. If you are physically on campus and connected via a wired connection in your office or through NYU’s WiFi, you can directly SSH into the clusters without any additional steps.
Secure Connections
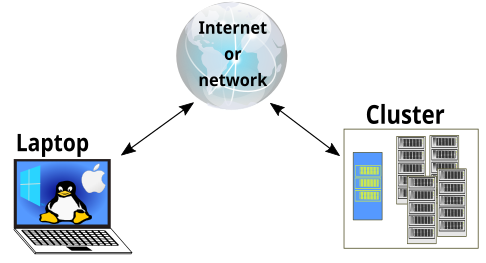
The first step in using a cluster is to establish a connection from your computer to the cluster. When we are sitting at a computer (or standing, or holding it in our hands or on our wrists), we have come to expect a visual display with icons, widgets, and perhaps some windows or applications: a graphical user interface, or GUI. Since computer clusters are remote resources that we connect to over slow or intermittent interfaces (WiFi and VPNs especially), it is more practical to use a command-line interface, or CLI, to send commands as plain-text. If a command returns output, it is printed as plain text as well. The commands we run today will not open a window to show graphical results.
If you have ever opened the Windows Command Prompt or macOS Terminal, you have seen a CLI. This is the CLI on your local machine. The only leap to be made here is to open a CLI on a remote machine, while taking some precautions so that other folks on the network can’t see (or change) the commands you’re running or the results the remote machine sends back. We will use the Secure SHell protocol (or SSH) to open an encrypted network connection between two machines, allowing you to send & receive text and data without having to worry about prying eyes.
SSH clients are usually command-line tools, where you provide the remote machine address as the only required argument. If your username on the remote system differs from what you use locally, you must provide that as well. If your SSH client has a graphical front-end, such as PuTTY or MobaXterm, you will set these arguments before clicking “connect.” From the terminal, you’ll write something like ssh userName@hostname, where the argument is just like an email address: the “@” symbol is used to separate the personal ID from the address of the remote machine.
When logging in to a laptop, tablet, or other personal device, a username, password, or pattern are normally required to prevent unauthorized access. In these situations, the likelihood of somebody else intercepting your password is low, since logging your keystrokes requires a malicious exploit or physical access. For systems like log-1 running an SSH server, anybody on the network can log in, or try to. Since usernames are often public or easy to guess, your password is often the weakest link in the security chain.
Remote Connections with the NYU VPN
If you are connecting from a remote location that is not on the NYU network (your home for example), you have have to set up your computer to use the NYU VPN. Once you’ve created a VPN connection, you can proceed as if you were connected to the NYU net.
Connect to the NYU VPN
To connect to VPN, please see the NYU instructions.
Log into the Torch Cluster
Inside the NYU network (non-Windows)
From within the NYU network, that is, from an on-campus location, or after you VPN inside NYU’s network, you can log in to the HPC clusters directly.
To log in to the HPC cluster (Torch), simply use:
ssh <NetID>@login.torch.hpc.nyu.edu
From Windows
Windows users will need to use PuTTY, please see the instructions.
Opening a Terminal
Accessing the Torch HPC cluster is primarily done through the Command Line Interface (CLI). A CLI provides a text-based environment that allows users to manage files, run programs, and navigate directories via command input. On macOS, the built-in CLI tool is Terminal, while Windows 10 users can leverage the Windows Subsystem for Linux (WSL) for similar functionality. Additionally, a popular tool for connecting to Linux servers from Windows is PuTTY, a free SSH client.
Connecting to an HPC system is most often done through a tool known as “SSH” (Secure SHell) and usually SSH is run through a terminal. So, to begin using an HPC system we need to begin by opening a terminal. Different operating systems have different terminals, none of which are exactly the same in terms of their features and abilities while working on the operating system. When connected to the remote system the experience between terminals will be identical as each will faithfully present the same experience of using that system.
Here is the process for opening a terminal in each operating system.
Linux
There are many different versions (aka “flavours”) of Linux and how to open a terminal window can change between flavours. Fortunately most Linux users already know how to open a terminal window since it is a common part of the workflow for Linux users. If this is something that you do not know how to do then a quick search on the Internet for “how to open a terminal window in” with your particular Linux flavour appended to the end should quickly give you the directions you need.
Open a terminal application and enter the following to connect to one of the HPC clusters:
# this will connect you to Torch HPC cluster
ssh <NetID>@login.torch.hpc.nyu.edu
Mac
Macs have had a terminal built in since the first version of OS X, since it is built on a UNIX-like operating system, leveraging many parts from BSD (Berkeley Software Distribution). The terminal can be quickly opened through the use of the Searchlight tool. Hold down the command key and press the spacebar. In the search bar that shows up type “terminal”, choose the terminal app from the list of results (it will look like a tiny, black computer screen) and you will be presented with a terminal window. Alternatively, you can find Terminal under “Utilities” in the Applications menu in the Finder.
Open a terminal application and enter the following to connect to Torch:
# this will connect you to Torch HPC cluster
ssh <NetID>@login.torch.hpc.nyu.edu
Windows
While Windows does have a command-line interface known as the “Command Prompt” that has its roots in MS-DOS (Microsoft Disk Operating System) it does not have an SSH tool built into it and so one needs to be installed. There are a variety of programs that can be used for this; a few common ones we describe here, as follows:
Git BASH
Git BASH gives you a terminal like interface in Windows. You can use this to connect to a remote computer via SSH. It can be downloaded for free from Git for Windows.
Windows Subsystem for Linux
The Windows Subsystem for Linux also allows you to connect to a remote computer via SSH. Please see the instructions from Microsoft.
MobaXterm
MobaXterm is a terminal window emulator for Windows and the home edition can be downloaded for free from mobatek.net. If you follow the link you will note that there are two editions of the home version available: Portable and Installer. The portable edition puts all MobaXterm content in a folder on the desktop (or anywhere else you would like it) so that it is easy to add plug-ins or remove the software. The installer edition adds MobaXterm to your Windows installation and menu as any other program you might install. If you are not sure that you will continue to use MobaXterm in the future, the portable edition is likely the best choice for you.
If you use MobaXterm you can use MobaKeyGen to manage your ssh keys. Please see the MoabXterm documentation for details.
Download the version that you would like to use and install it as you would any other software on your Windows installation. Once the software is installed you can run it by either opening the folder installed with the portable edition and double-clicking on the executable file named MobaXterm_Personal_11.1 (your version number may vary) or, if the installer edition was used, finding the executable through either the start menu or the Windows search option.
Once the MobaXterm window is open you should see a large button in the middle of that window with the text “Start Local Terminal”. Click this button and you will have a terminal window at your disposal.
PuTTY
It is strictly speaking not necessary to have a terminal running on your local computer in order to access and use a remote system, only a window into the remote system once connected. PuTTY is likely the oldest, most well-known, and widely used software solution to take this approach.
PuTTY is available for free download. Download the version that is correct for your operating system and install it as you would other software on your Windows system. Once installed it will be available through the start menu or similar.
Running PuTTY will not initially produce a terminal but instead a window full of connection options. Putting the address of the remote system in the “Host Name (or IP Address)” box and either pressing enter or clicking the “Open” button should begin the connection process.
If this works you will see a terminal window open that prompts you for a username through the “login as:” prompt and then for a password. If both of these are passed correctly then you will be given access to the system and will see a message saying so within the terminal. If you need to escape the authentication process you can hold the Control (Ctrl) key and press the c key to exit and start again.
Note that you may want to paste in your password rather than typing it. Use Ctrl plus a right-click of the mouse to paste content from the clipboard to the PuTTY terminal.
For those logging in with PuTTY it would likely be best to cover the terminal basics already mentioned above before moving on to navigating the remote system.
Open OnDemand (Web-based Graphical User Interface)
Open OnDemand (OOD) is an open source project funded by the National Science Foundation (NSF). OOD is designed to create easier access for users to interface with HPC systems. Originally developed by Ohio Supercomputer Center (OSC), used by many universities around the world, and now servicing the NYU Torch HPC cluster.
OOD has a variety of convenient tools to manage files, access the command line, manage and monitor jobs, and launch interactive applications, such as Jupyter Notebooks, RStudio sessions, and even full Linux Desktops.
Features Include:
- Easy file management - upload and download files, view HTML and pictures without downloading
- Command-line shell access without any SSH client locally installed
- Job management and monitoring
- Full Linux desktop experience without X11
- Interactive Apps such as JupyterHub and RStudio without the need for port forwarding
OOD is accessible to all users with a valid NYU HPC account while on-campus network or through a VPN.
To access OOD visit: https://ood.torch.hpc.nyu.edu (VPN Required)
Access the Shell
Under the clusters menu you can select the Torch Shell Access option to access the Linux shell. No local SSH client is required.
Interactive Applications
GUI based applications are accessible without the need for port or X11 forwarding. Select the Interactive Apps menu, select the desired application, and submit the job based on required resources and options.
Troubleshooting Connections to Open OnDemand
A common issue that can occur is receiving an error that the Open OnDemand page cannot be reached. Sometimes this can indicate that the service is down, but often this is an issue with the the local browser cache. You can test this by opening a private browser window and seeing if https://ood.torch.hpc.nyu.edu will load. If it does, try deleting the cache for https://ood.torch.hpc.nyu.edu in your browser history to resolve this issue.
In Chrome, this can be done by navigating to this page in your settings:
chrome://settings/content/all?searchSubpage=ood.torch.hpc.nyu.edu&search=site+data
The link above will automatically search for the Open OnDemand site data and cookies. You can then simply click on the trashcan icon to delete the site cache.
Once done, try navigating again to https://ood.torch.hpc.nyu.edu and the site should load. For other issues please email hpc@nyu.edu.
SSH Agents on Linux, macOS, and Windows
Open your terminal application and check if an agent is running:
[user@laptop ~]$ ssh-add -l
If you get an error like this one,
Error connecting to agent: No such file or directory
… then you need to launch the agent as follows:
[user@laptop ~]$ eval $(ssh-agent)
The syntax of this SSH Agent command is unusual, based on what we’ve seen in the UNIX Shell tutorial. This is because the ssh-agent command creates opens a connection that only you have access to, and prints a series of shell commands that can be used to reach it – but does not execute them!
[user@laptop ~]$ ssh-agent
SSH_AUTH_SOCK=/tmp/ssh-Zvvga2Y8kQZN/agent.131521;
export SSH_AUTH_SOCK;
SSH_AGENT_PID=131522;
export SSH_AGENT_PID;
echo Agent pid 131522;
The eval command interprets this text output as commands and allows you to access the SSH Agent connection you just created.
You could run each line of the ssh-agent output yourself, and achieve the same result. Using eval just makes this easier.
- Otherwise, your agent is already running: don’t mess with it.
SSH Agent on PuTTY
If you are using PuTTY on Windows, download and use pageant as the SSH agent. See the PuTTY documentation.
Modifying your .ssh/config file
Please add the following lines to your ~/.ssh/config file:
Host dtn.torch.hpc.nyu.edu
  User <NetID>
  StrictHostKeyChecking no
  ServerAliveInterval 60
  ForwardAgent yes
  UserKnownHostsFile /dev/null
  LogLevel ERROR

Host torch login.torch.hpc.nyu.edu
  Hostname login.torch.hpc.nyu.edu
  User <NetID>
  StrictHostKeyChecking no
  ServerAliveInterval 60
  ForwardAgent yes
  UserKnownHostsFile /dev/null
  LogLevel ERROR
You'll need to replace the sections above labelled <Your NetID> with your NetID. You can find more details about this at the Quickstart section of Accessing HPC at NYU
Logging onto the system
With all of this in mind, let’s connect to our remote HPC system. In this tutorial, we will connect to Torch — an HPC system located at New York University. Although it’s unlikely that every system will be exactly like Torch, it’s a very good example of what you can expect from an HPC installation. To connect to Torch we will use SSH (if you are using PuTTY see details above).
SSH allows us to connect to UNIX computers remotely, and use them as if they were our own. The general syntax of the connection command follows the format:
ssh yourUsername@some.computer.address
Once you are on the NYU WiFi or VPN you can connect with:
ssh <NetID>@login.torch.hpc.nyu.edu
When you are logged in you will see information about your last login. It should look something like this:
> ssh login.torch.hpc.nyu.edu
(NetID@login.torch.hpc.nyu.edu) Authenticate with PIN ... at https://login.microsoft.com/device and press ENTER.
Last login: Tue Mar 17 17:16:15 2026 from 10.27.3.62
[NetID@torch-login-4 ~]$
By looking at the information after Hostname: and in the prompt you'll notice that the machine you're currently logged into is not Torch. This is expected. You've just logged into a login node that is connected to Torch. It is from the login nodes that you will submit jobs to Torch.
If you logged in using PuTTY this will not apply because it does not offer a local terminal.
Telling the Difference between the Local Terminal and the Remote Terminal
You can see that the prompt has changed after you log into a remote system. Let's take a closer look at the prompt after login: [NetID@log-1 ~]$ (in this example) tells us that we are logged into the login node log-1 with the identity NetID.
This change presents a small complication that we will need to navigate throughout this workshop. Exactly what is reported before the $ in the terminal when it is connected to the local system and the remote system will typically be different for every user. We still need to indicate which system we are entering commands on though so we will adopt the following convention:
[local]$when the command is to be entered on a terminal connected to your local computer[NetID@glogin-1 ~]$when the command is to be entered on a terminal connected to the remote system$when it really doesn’t matter which system the terminal is connected to
Being certain which system your terminal is connected to
If you ever need to be certain which system a terminal you are using is connected to then use the following command:
$ hostname
Keep two terminal windows open
It is strongly recommended that you have two terminals open, one connected to the local system and one connected to the remote system that you can switch back and forth between. If you only use one terminal window then you will need to reconnect to the remote system using one of the methods above when you see a change from [local]$ to [NetID@login-1 ~]$ and disconnect when you see the reverse.